Zapier - Custom Integration Example (Workspace ONE)
This provides an example of a custom integration built with Zapier
This guide documents an example of a custom integration where Zapier is used for a custom integration that syncs user and license data automatically to Torii.
The Zap has 3 steps, as shown in the diagram below.
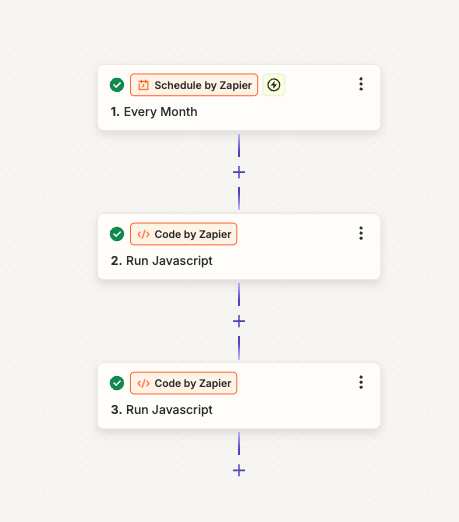
Each of the steps is documented further below.
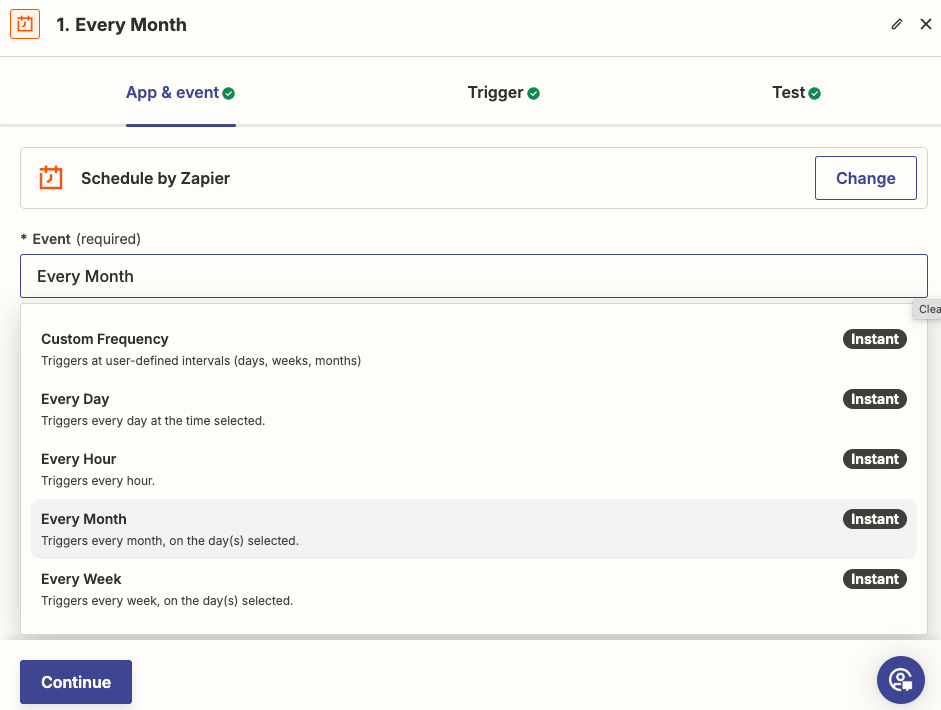
Schedule by Zapier
First set a schedule for the Zap, if we want the integration to work like an OOTB Torii integration, then we could set a schedule to sync once per day. This example is configured to sync once a month.
Code by Zapier (Fetch data from application)
The next step uses Javascript code to request data from the application about users and licenses. The application used as an example here is Omnissa's (formerly VMware) Workspace ONE.
let WS1Token = "<your_WS1_API_key";

let options = {
    method: 'GET',
    headers:
    {
        'Content-Type': 'application/json',
        'Authorization': `HZN ${WS1Token}`
    }
};

let response = await fetch('https://<your_ws1_hostname>/SAAS/jersey/manager/api/scim/Users?count=10&filter=domain%20eq%20%221dsavm.com%22', options);
let body = await response.json();
let filteredData = body.Resources;
let users = filteredData.map(item => {
  return {
    firstName: item.name.givenName,
    lastName: item.name.familyName,
    email: item.emails[0].value,
    status: "active"
  }
});
let licenses =filteredData.map(item => {
  return {
    email: item.emails[0].value,
    licenseStatus: "active"
  }
});
let ws1users = JSON.stringify(users);
let ws1licenses = JSON.stringify(licenses);
//console.log(JSON.stringify(users));
output = { ws1users, ws1licenses };
Code by Zapier (Transform to Torii JSON and sync integration)
The final step transforms the data received from the Workspace ONE API into the JSON format required by Torii and executes the 4 API calls required to sync the custom integration.
Use the two arrays that we created based on data that has been pulled from Workspace ONE as input data. This is configured as in the screenshot below.
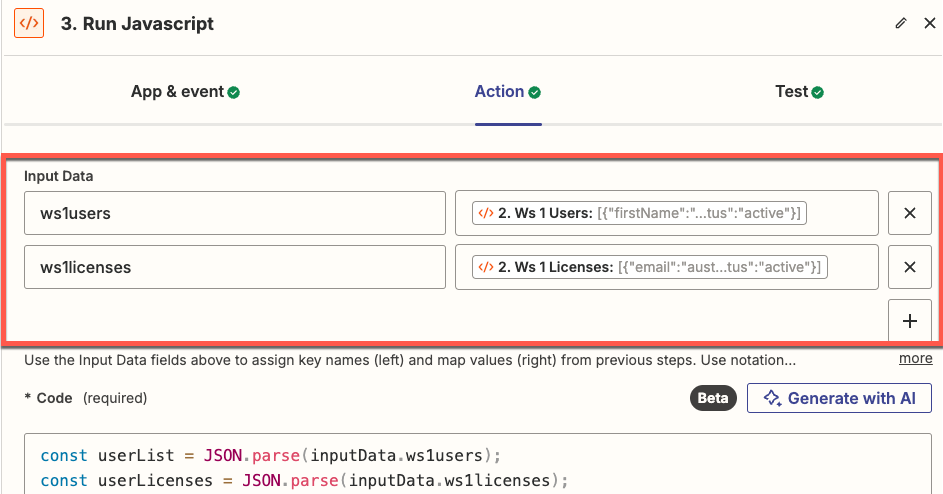
Next add the code below, make sure you use your Torii API key for the variable production_token.
const userList = JSON.parse(inputData.ws1users);
const userLicenses = JSON.parse(inputData.ws1licenses);
const production_token = '<your_torii_api_key';
const accountId = '39116';

let file = {
  users: userList,
  licenses: [{
  name: "Workspace ONE Enterprise",
  users: userLicenses
}]
}

// Get S3 file url
let options = {
  headers: { 'Authorization': `Bearer ${production_token}` }
}
let response = await fetch('https://api.toriihq.com/v1.0/files/url?name=my_file.json&type=customIntegrationData', options);
let body = await response.json();
let s3url = body.uploadFileParameters.url;
let filePath = body.uploadFileParameters.filePath;

// Upload file to S3
options = {
    method: 'PUT',
    body: JSON.stringify(file),
    headers: {
        'Content-Type': 'customIntegrationData'
    },
}
response = await fetch(s3url, options);

// Get file id
options = {
    method: 'POST',
    body: JSON.stringify({
        path: filePath,
        type: 'customIntegrationData'
    }),
    headers: {
        'Authorization': `Bearer ${production_token}`,
        'Content-Type': 'application/json'
    }
}
response = await fetch('https://api.toriihq.com/v1.0/files', options);

body = await response.json();
let fileId = body.id

// Sync custom integration
options = {
    method: 'PUT',
    body: JSON.stringify({
        idFile: fileId,
        idAppAccount: accountId
    }),
    headers: {
        'Authorization': `Bearer ${production_token}`,
        'Content-Type': 'application/json'
    }
}
response = await fetch('https://api.toriihq.com/v1.0/services/sync/custom', options);

body = await response.json();


// output = {s3url: s3url, filePath: filePath};
output = { response: response };
Updated 10 months ago