Using Postman to validate your JSON payload
A Postman collection with an example of the users and licenses JSON payload
This guide documents a Postman collection that can be used as a starting point to validate and test the JSON payload your integration will send to Torii. The collection contains 4 pre-populated API calls with most of the data required to run the requests.
Click the Run in Postman button to access the collection. The collection should be imported into your workspace.

The environment specific variables that need to be set for your Torii account are documented below.
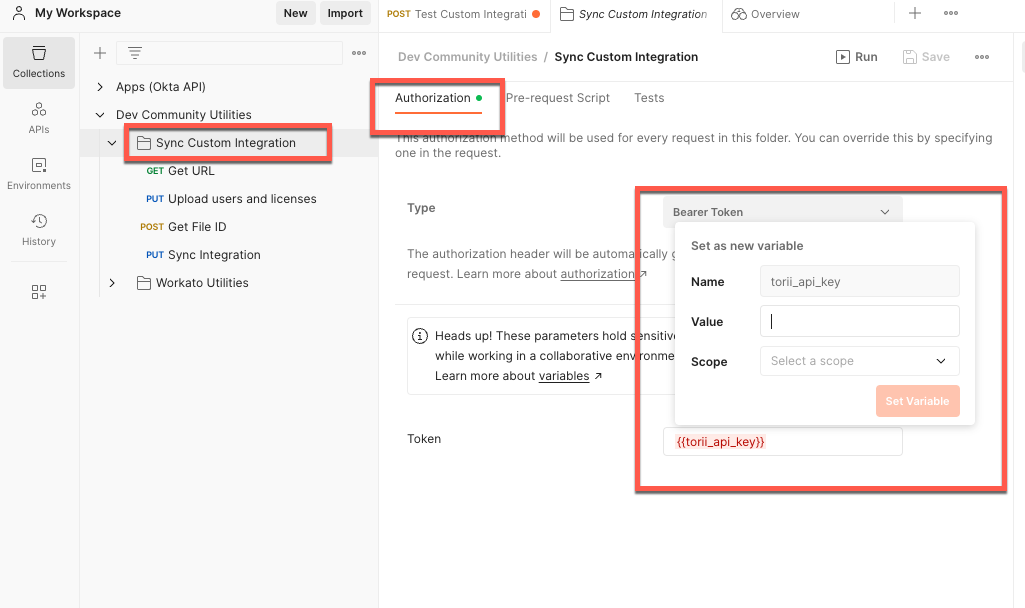
Collection setup
- At the Sync Custom Integration folder level, configure the variable that stores your Torii API key - torii_api_key.
Running the requests in the collection
- Configure the Get URL request by setting up the name query string parameter.

- Send the request and view the response data.
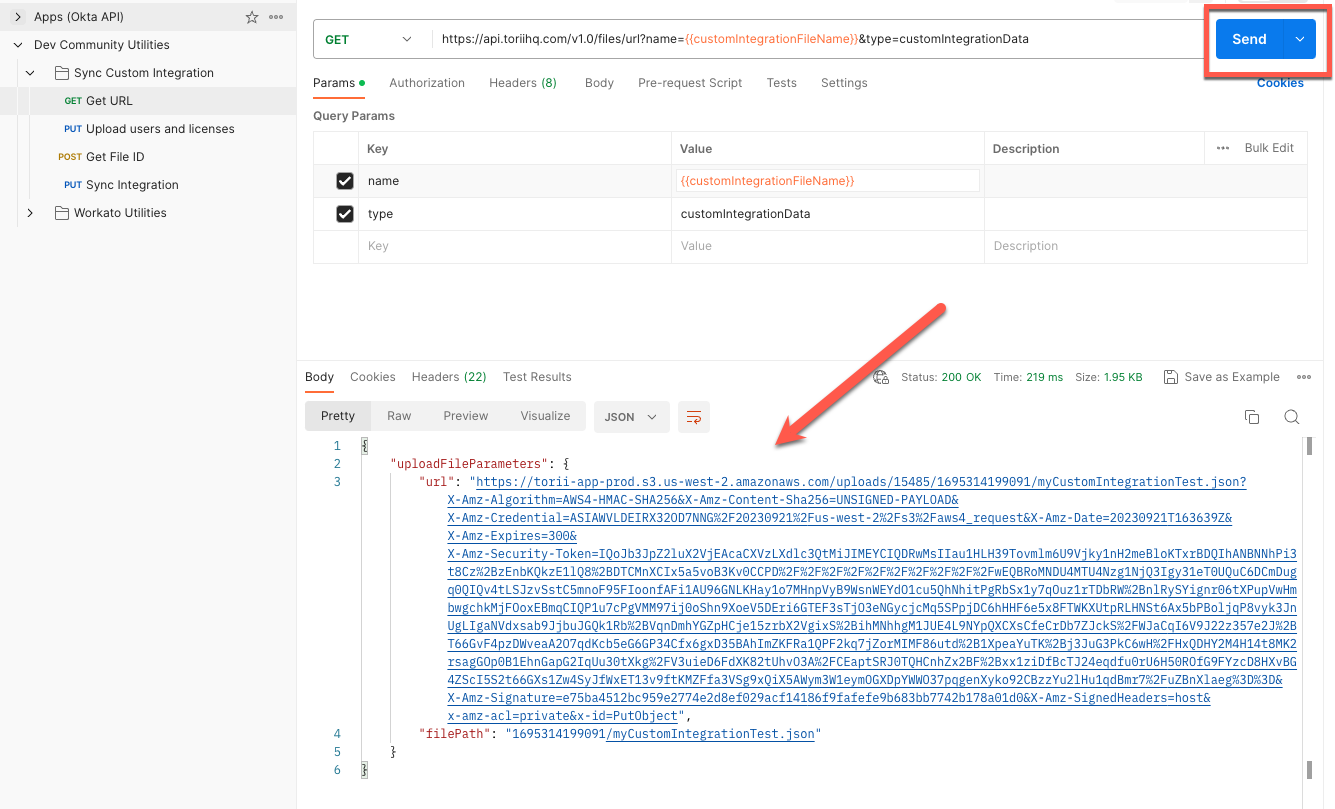
- Copy the value of url from the previous step and paste it as the URL for the PUT request for upload users and licenses.
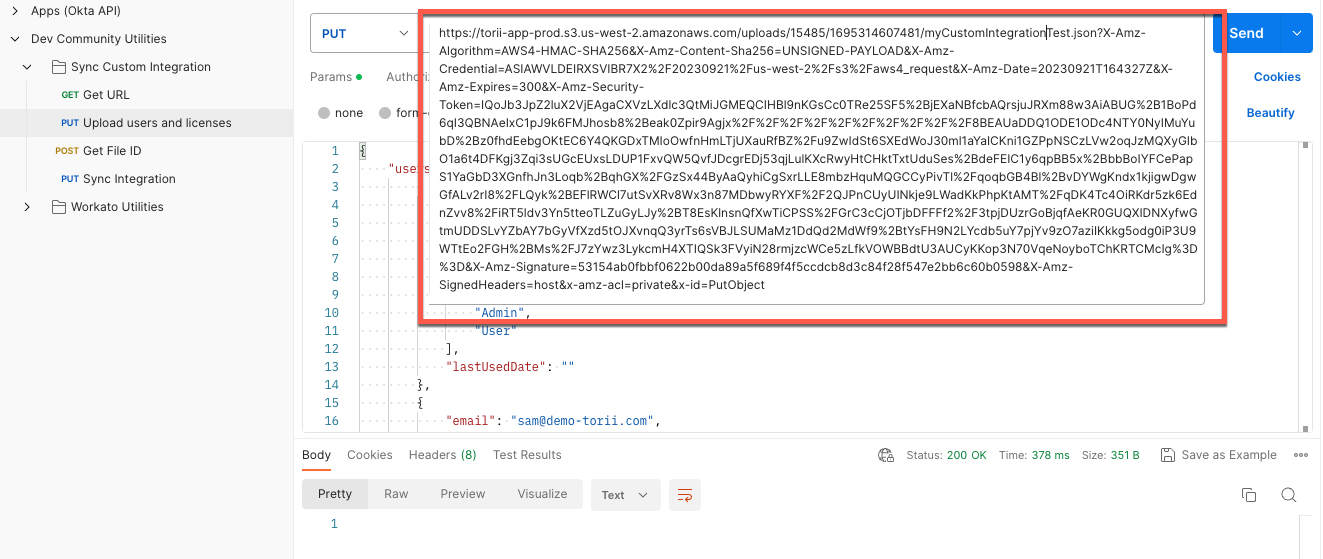
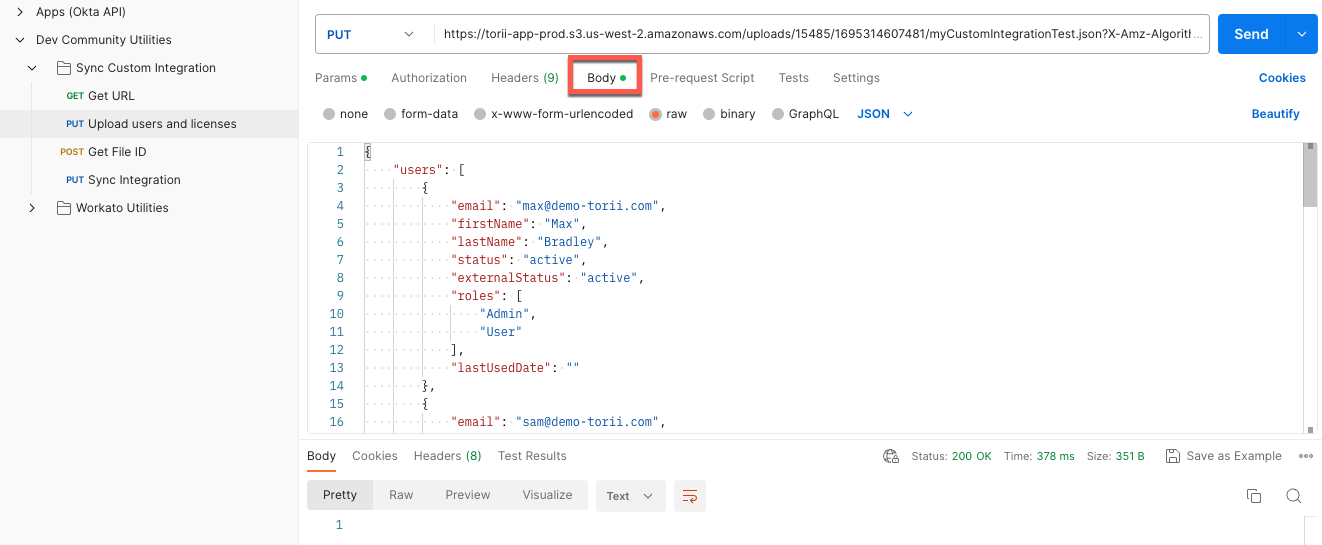
- Review the sample JSON body and make any changes required to reflect the licenses for the application you would like to test.
{
    "users": [
        {
            "email": "[email protected]",
            "firstName": "Max",
            "lastName": "Bradley",
            "status": "active",
            "externalStatus": "active",
            "roles": [
                "Admin",
                "User"
            ],
            "lastUsedDate": ""
        },
        {
            "email": "[email protected]",
            "firstName": "Sam",
            "lastName": "Johnsom",
            "status": "active",
            "externalStatus": "active",
            "roles": [
                "User"
            ],
            "lastUsedDate": ""
        },
        {
            "email": "[email protected]",
            "firstName": "Jenny",
            "lastName": "Wilson",
            "status": "active",
            "externalStatus": "active",
            "roles": [
                "User"
            ],
            "lastUsedDate": ""
        }
    ],
    "licenses": [
        {
            "name": "Professional",
            "unassignedAmount": 250,
            "users": [
                {
                    "email": "[email protected]",
                    "licenseStatus": "active",
                    "lastUsedDate": "2023-06-04T14:43:14Z"
                }
            ],
            "pricePerUser": 100000
        },
        {
            "name": "Collaborator",
            "unassignedAmount": 250,
            "users": [
                {
                    "email": "[email protected]",
                    "licenseStatus": "active"
                },
                {
                    "email": "[email protected]",
                    "licenseStatus": "active"
                },
                {
                    "email": "[email protected]",
                    "licenseStatus": "active",
                    "lastUsedDate": "2023-09-04T14:43:14Z"
                }
            ],
            "pricePerUser": 50000
        }
    ]
}- Paste the filePath value returned in the response from step 2 as the value for path in the Get File ID request.
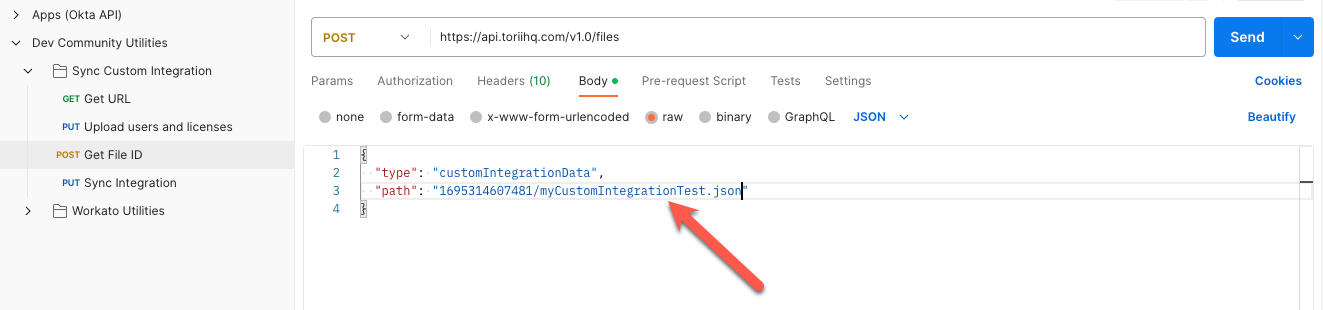
- Send the request and view the response data that is returned.

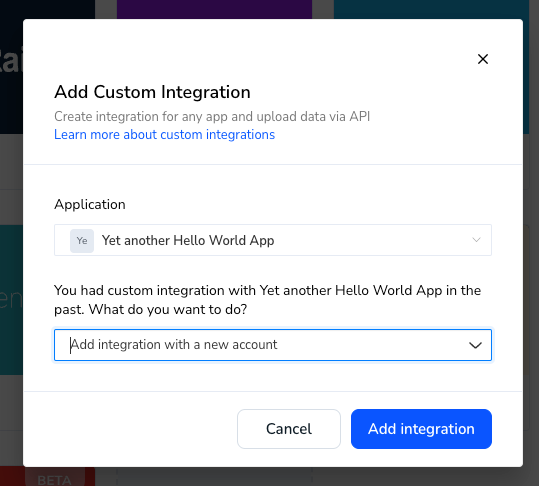
- In your Torii console add a custom integration from the Integrations view.
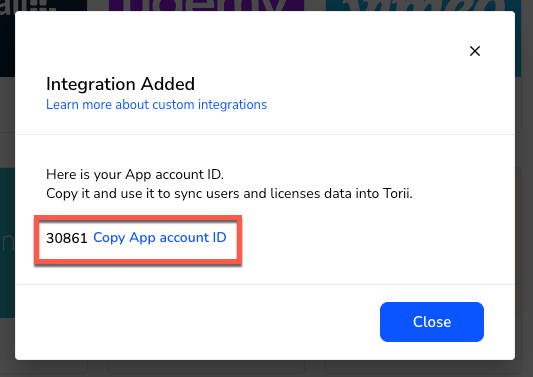
- Copy the app account id value that is returned once the integration has been added.
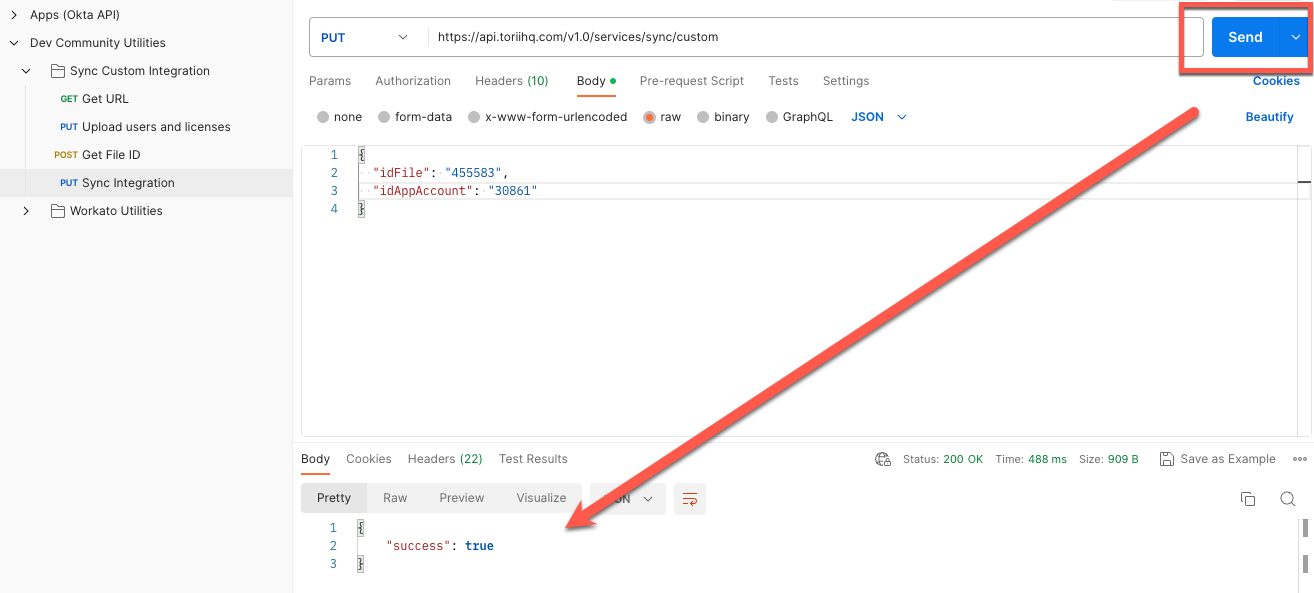
- Setup the Sync Integration request by using the id from step 6 and the app account id from step 8.
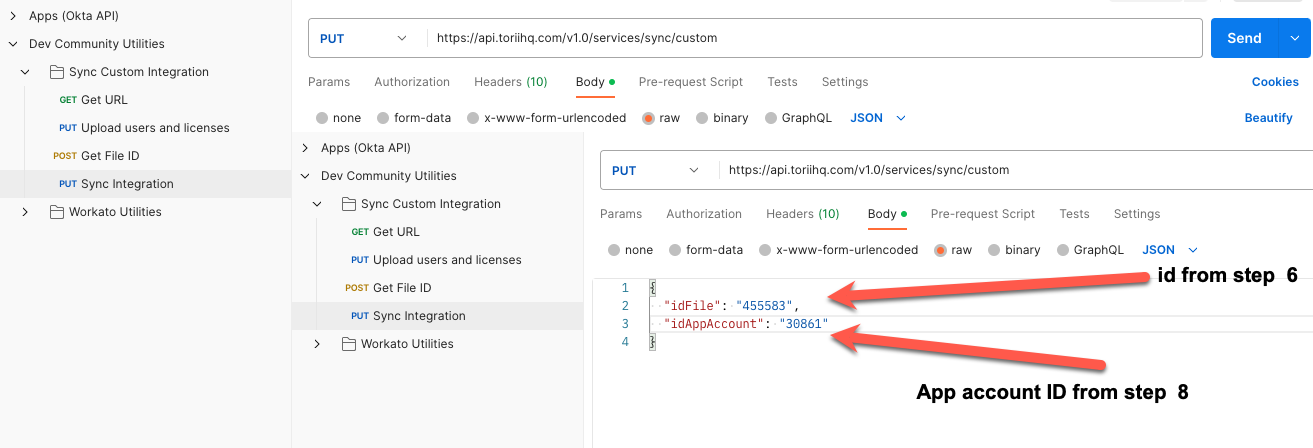
- Send the request and look for sucess set to true in the response.
- Confirm the integration has synced successfully in the Integrations view of your Torii console.
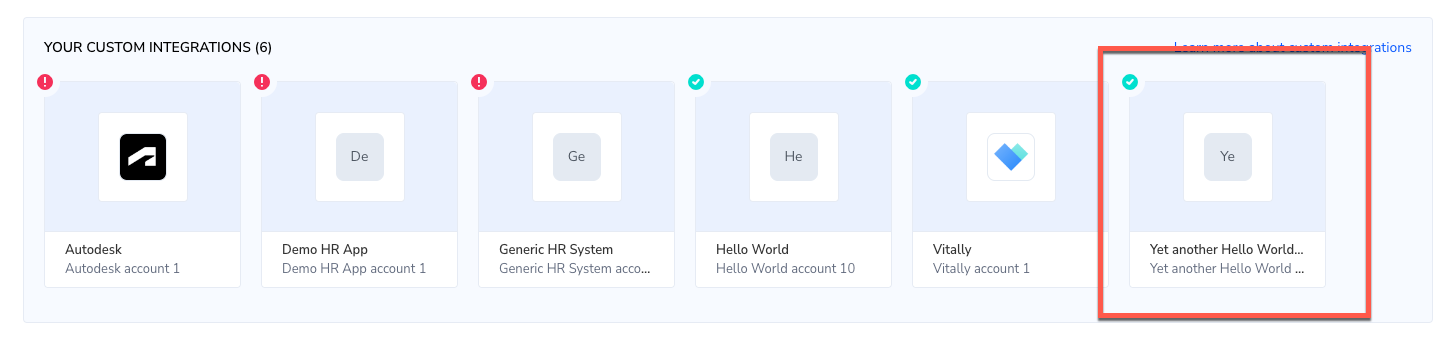
- Confirm the application's license information can be viewed in the Licenses view.
Updated 10 months ago
Did this page help you?